
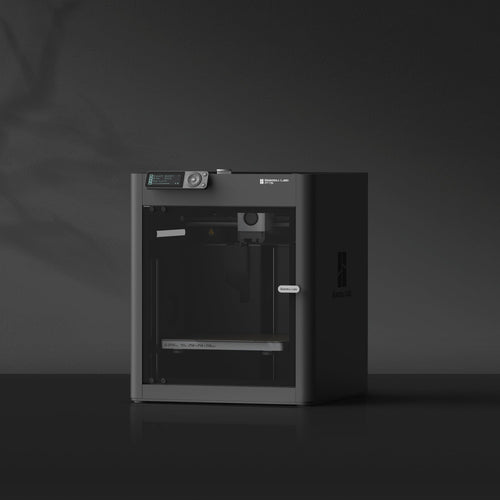
Set up the printer
Unpack, connect to a wall outlet and complete the guided calibration.
BAMBU LAB + ANKER SOLIX
Three ready-to-start printer and material kits. Choose your purpose; we have matched the essentials.
Choose your configuration ↓
01 / WHAT WOULD YOU LIKE TO MAKE?
Printer and materials already matched. Every material below includes a spool.
Project inspiration. Printed objects and workspace items are not included.
 1 × P1S printer$349.00 USD
 2 × PLA Basic · Black · 1kg with spool$35.98 USD
 1 × P1S AMS Combo$479.00 USD1 × PLA Basic · Black · 1kg with spool$17.99 USD
 1 × PLA Basic · Jade White · 1kg with spool$17.99 USD
 1 × PLA Basic · Red · 1kg with spool$17.99 USD
 1 × PLA Basic · Blue · 1kg with spool$17.99 USD
1 × P1S printer$349.00 USD
 1 × PETG Basic · Black · 1kg with spool$16.99 USD
 1 × PETG Basic · Gray · 1kg with spool$16.99 USD
PLA is the easy starting material for indoor models and organizers. Two black 1kg spools are included.
02 / WHERE WILL YOU PRINT?
Solar field kit: equipment, portable power and one PS200 panel.
 1 × Anker SOLIX C1000 Gen 2 Portable Power StationAnker SOLIX C1000 Gen 2 Portable Power Station$549.99 USD
 1 × Anker SOLIX PS200 Solar Panel$499.99 USD
Your selected purpose kit includes the printer configuration and full-size spooled materials shown above. The Color Project Kit includes AMS; the other two kits use the external spool holder.
Mobile power adds the listed station and its supplied AC charging cable.
Solar field kit adds one PS200 panel and its supplied solar-to-XT60 connection and extension cables. Confirm the cable set against the delivered panel version.
Use a level, dry, ventilated work surface. Plan the complete print duration and startup load; portable power does not guarantee uninterrupted printing during source switching.
Solar-kit credit is submitted in cart for the complete solar package.
Review your cart →Your selected equipment is itemized in the cart. Eligible kit savings, tax and shipping are confirmed at checkout.
Already own some equipment? Ask DRT →YOUR FIRST PRINT
Unpack, connect to a wall outlet and complete the guided calibration.
Select the matching Bambu material profile. Dry PETG before printing using the current material guide.
Use a compatible P1S print profile. Check the first layer before starting a larger project.
OPTIONAL POWER & SOLAR
For the solar configuration, connect one PS200 to the station’s solar input. The mobile configuration uses the station without a panel. Power the equipment through its original AC cable or matching charger.
 PS200 · 200 WIncluded solar-to-XT60 cable
 C1000 Gen 2AC outlet → original device charger
 Charge & workUse the manufacturer’s power cable
Use a single panel, not a series string. Confirm the panel label and connector before use. Keep the station and chargers dry, shaded and within their operating temperature limits.
— illustrative daily solar energy
AC estimate = 1,024 Wh × 80% ÷ average watts. Solar estimate = 200 W × sun hours × 75%. These are planning assumptions, not measured kit runtimes; temperature, load, shading and conversion losses change results. Solar output is not added to the AC-runtime estimate.SEE THE CORE EQUIPMENT IN ACTION
Manufacturer demonstrations explain the equipment. Your selected configuration determines which power equipment and accessories are included.
Manufacturer specifications ↗Power station specifications ↗Already own part of this setup? Tell DRT what you have and what you need.
BUILD WITH DRT
Share your equipment and working conditions. DRT can help with the component list, compatible add-ons and configuration quote.
Configuration references reviewed November 9, 2026. Choose the exact model and region when opening a manufacturer document. Kit connections and runtime calculations are DRT planning recommendations, not manufacturer certification of a combined system.